THE BEST AT HOME
- Home
- Products
- Service
- About Deponti
- Working at Deponti (vacancies)
- Contact
- Dealer login UK - IRL
- Dealer login outside UK - IRL
- Report glass box empty
THE BEST AT HOME
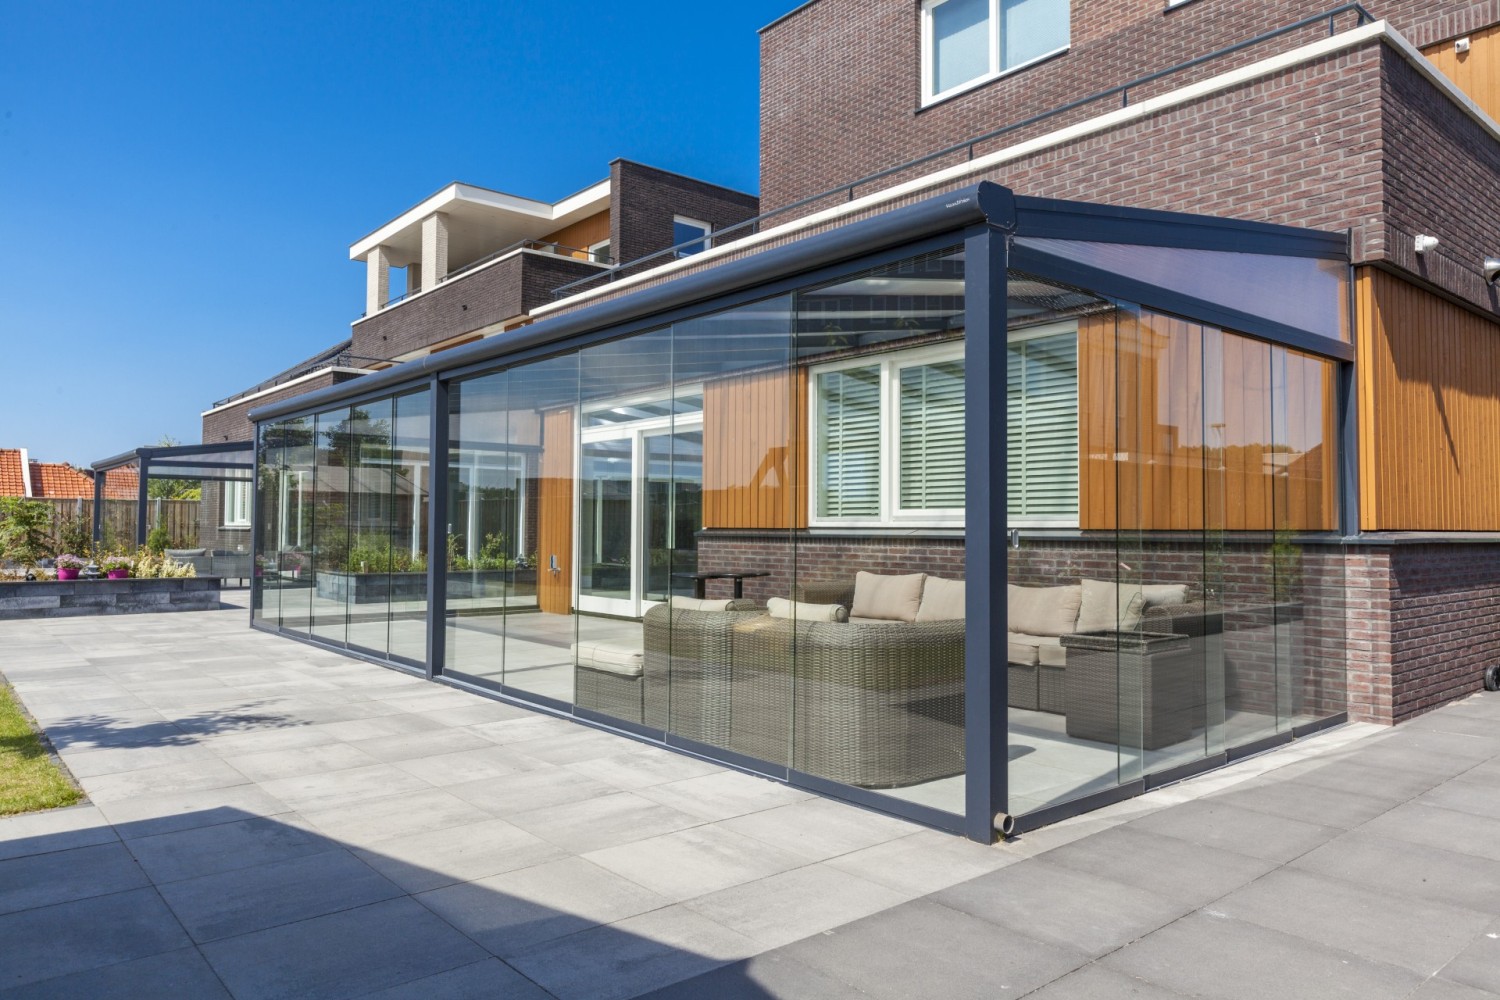
Imagine. You sit under your veranda with a delicious coffee. The sun is shining, but the cold wind is blowing underneath. Not only your coffee, but also you cool down quickly. You walk in and think: if only I had glass sliding doors…
Don't worry, because in a short time you can transform your beautiful veranda into a garden room with glass sliding doors. Difficult? Not at all. Even with two left hands you can install the sliding doors yourself. With this blog we help you in 6 steps to do this yourself. This way you will be enjoying this sustainable solution for your veranda before you know it. And the great thing: no 'professional' to be involved.
We start with the assembly video that we made especially for you. In this video you can easily see step by step how to assemble glass sliding doors.
Before you diligently get started with your handy hands, we will explain the steps below one by one. Handy to print out and take with you.
A good start is half the work. Especially when it comes to chores. So don't get started too quickly, but first prepare well and read up on it. This will save you a lot of time afterwards. To help you with this, we ask you some essential preparation questions. That way you know what applies to your situation.
You are well prepared and have all the materials for the glass sliding doors at home. Prepare everything carefully. Place the parts on a soft, clean and flat surface to prevent damage to your glass sliding doors. Never place the glass panels directly on the ground. Tempered glass is scratch sensitive. Before you start the actual assembly, have the right tools ready. For example, think of a spirit level, tape measure, pencil, drill, saw, box cutter and a ladder.
The wheel systems are already fully prepared at Deponti and no longer need to be mounted. All you have to do is unscrew the running wheels on the front side.
Place a glass panel stably and horizontally at working height. For example on a table or on trestles. Place something between the substrate and the glass panel to prevent damage. Then slide the U-rubber over the entire underside of the glass panel and cut the rubber to size.
Now the H-profile has to be slid over the U-rubber with the open side. A golden tip is to spread some washing-up liquid or Glassex over the U-rubber of the glass panel. That makes it easier.
Repeat the above steps for all glass doors.

Measure the installation width of the top rails at the top of the opening. Place the top rail at working height on, for example, a table or on trestles. Mark the installation width on the top rail and saw off to the correct length.
Mark the drill holes in the center of the profile. Start 10cm from the edge and mark the next holes 70-90cm from the previous hole. Then you drill holes of ø4mm and countersink the holes ø8mm at the bottom.
Now you can start mounting the top rail. Place the top rail against the top of the opening and check that it is level. Then screw the top rail to the gutter profile or top beam. The type of fastener, as described earlier, depends on the type of substrate.
Repeat all the above steps for the bottom rail as well. The only thing you have to pay attention to is that when mounting the bottom rail, make sure that the water drainage slot is on the outside.

After all these steps it is finally time to put the glass panels in the system! Make sure you are with two people for this. It is important to always choose the right 'track' for the glass panel.
Take the first glass panel and insert it into the 1st track in the top rail. Then lower the glass panel onto the same track on the bottom rail.
Repeat these steps until all glass panels are installed in the rail.

You're almost there now. You only need to check whether all panels are straight. In some cases, the surface is not completely level, which means that it can deviate. Fortunately, it is very easy to adjust the glass panels properly. You do this by adjusting the running wheels to the correct height with a Phillips screwdriver.
Done? Then your glass sliding doors are ready. Time to enjoy!

You can make your glass sliding doors even more beautiful and comfortable. Below we briefly outline the possibilities:
U-profiles are available for the side finish of a glass sliding door. These profiles can be mounted on the glass door or side for a neat finish and absorb any strange sight with a crooked wall.
Without handles, you quickly get dirty fingerprints when you want to open or close the glass sliding doors. Prevent this by adding a handle to the glass sliding doors.
As a finishing touch to the glass sliding doors, aluminum profiles can be mounted on the sides of the glass panels with brushes. These provide a windproof finish and stabilize and support the glass doors when sliding.
'Retainers' ensure that all panels are automatically included when the glass sliding door is opened or closed. This way you can easily open or close the entire system. The carriers can be mounted variably in the profile, so that you can determine yourself where you want the panels to overlap.
How to mount these options is easy to find in the supplied mounting manual.
Piece of cake, right? We wish you a lot of job fun!
If you still can't figure it out, have questions or want to buy immediately? Contact a deponti dealer in your area quickly and request information and a quote!